Sunday, March 3, 2013

L.E.D.s, a Side Project

I wanted to add some LED's to my RepRap but I couldn't decide a color or how to build them. So I figured why not have my cake and eat it too. I created a multicolored arrey of LED's. Colors included are yellow, red, blue and green. I still can't decide how I am going to set them up to turn on. I could use a switch but that's kind of boring. I'm debating on setting up patterns to run. One option is to have the LED's change color to coincide with bed or hot in temp. Blue for cold and red for hot. I could also use green as power on and yellow as a pilot light for active printing. I have it setup so I can runs multiple colors at the same time so I can mix colors as well. I kinda like making the LED's useful as well as aesthetics. I'm a multipurpose and multitasking kinda builder. I will update as the build comes along. I will be using an Arduino to run the patterns and temp settings for the lights. 

UPDATE: March 6th 2013---»
I've been looking into all kinds of different LED setups online and I'm now debating if I should setup lighting patterns and other cool setup with my LED's. More then likely I will use my Arduino and charlieplexing so I can control as well as program individual LEDs. It will be fun to build my own programs. I'm not sure if I will dive into the setup I previously stated. The best part is the fact that I am learning a lot more than I had previously known about LEDs and programming them with my Arduino. I also decided to re-wire the LEDs so I can color code all the wiring according to placement and color. This will help a lot when it comes to hooking everything up as well as programming. I will make sure to add to this as decisions are made.

Update on Printrbot Build Log

For one reason or another I recently lost the majority of my updated posts on my Printrbot Nintendo Edition build logs. There is also 3 separated entries which makes you as the reader have to jump around from entry to entry. So in order to make it easier for you guys, I am going to consolidate the separated entries into one full build log with photos from start to finish on the Printrbot Nintendo Edition build. I will post the updated log within the next few days so make sure to check back soon. Thanks.

Saturday, March 2, 2013

New J-Head modifications

I am currently working on building my new version of the J-Head hot end. I will be making a few modifications, some of them being an detachable nozzle. I am going to mill down solid brass acorn nuts with various size nozzle holes. They will more than likely range from .25mm to .50mm. I will also add some threads to the brass heating block which will make for quick nozzle changes as well as easy cleaning and future modifications. I will initially build 2 hot ends that will be run on a Wades hinged cold end with an adapter plate. One adapter plate will be made from milled aluminium and the other from acrylic. Both of these will be ran through extensive tests and will be made using the best materials. After all testing is done I might offer a few for sale at a reasonable price. I am also thinking about making one 1.75mm and the other 3mm. I will be using the majority of the new J-Head designs and I will also post test results on this site. Eventually these hot ends will be tested with several different cold end and machine setups. The picture below will show the basic design I have chosen for this build. They will be build, tested and re-manufactured at a local machine shop. Make sure to check back for updates. They will also be using both the original and the new temp sensors and wire round resisters.

Wednesday, February 27, 2013

Best option for a hybrid


I've seen many attempts at a hybrid 3D printer and CnC. This one is the best I've seen. It can cut, plasma cut, extrude and much much more. I've been watching this build since the beginning and it looks promising. I must admit I have not seen the cold and hot end but with a master designer like this I'm thinking I will be surprised. This is the best of the best. Estimated build costs reach about $4,000 which really wouldn't be a bad cost for just a quality CnC. This is definitely for the big boys. The estimated build cost does not include heated bed, extruded or mount. He is also selling some kits at cost to get the ball rolling on future development of the Platform. For further information check out the Platform CnC page. He also offers a basic MDF CnC plans for an earlier design. I also have further information that you can not find on his site. If you have further questions or build photo needs feel free to get a hold of me. Here's a link to the Platform page

Basic Stepper Wiring Guide

This is just a basic wiring guide for some stepper motors. Here is a link to a log for all those random stepper motors that have been found in random scraped electronics, printers and scanners. Click here

Stand Alone Printing Ideas

I am currently working on a stand alone or computer assisted control. I have a few options that I am currently looking into. One of them is to drastically slim down the computer size and the other option is similar to the rasberry PI with a pronterface like UI. I kinda like the stand alone option with everything tucked into a larger portable controller with mounted screen. Something that is easily transported and easily setup with any printer that is using Ramps. Some of the other options that I am pursuing are more workstation oriented. I'm sure that either way I go I will be satisfied. If not then I will continue with further redesign. I posted some pictures showing the options of the routes I may take. I currently have a 7" screen mounted to my Printrbot Nintendo ed. That is controlled through an old skool Nintendo controller. I will more than likely take down the 7" screen and mount it into a portable controller that is simply plugged into my current setup. Check back soon, I will update as I continue with the design.

Tuesday, February 26, 2013

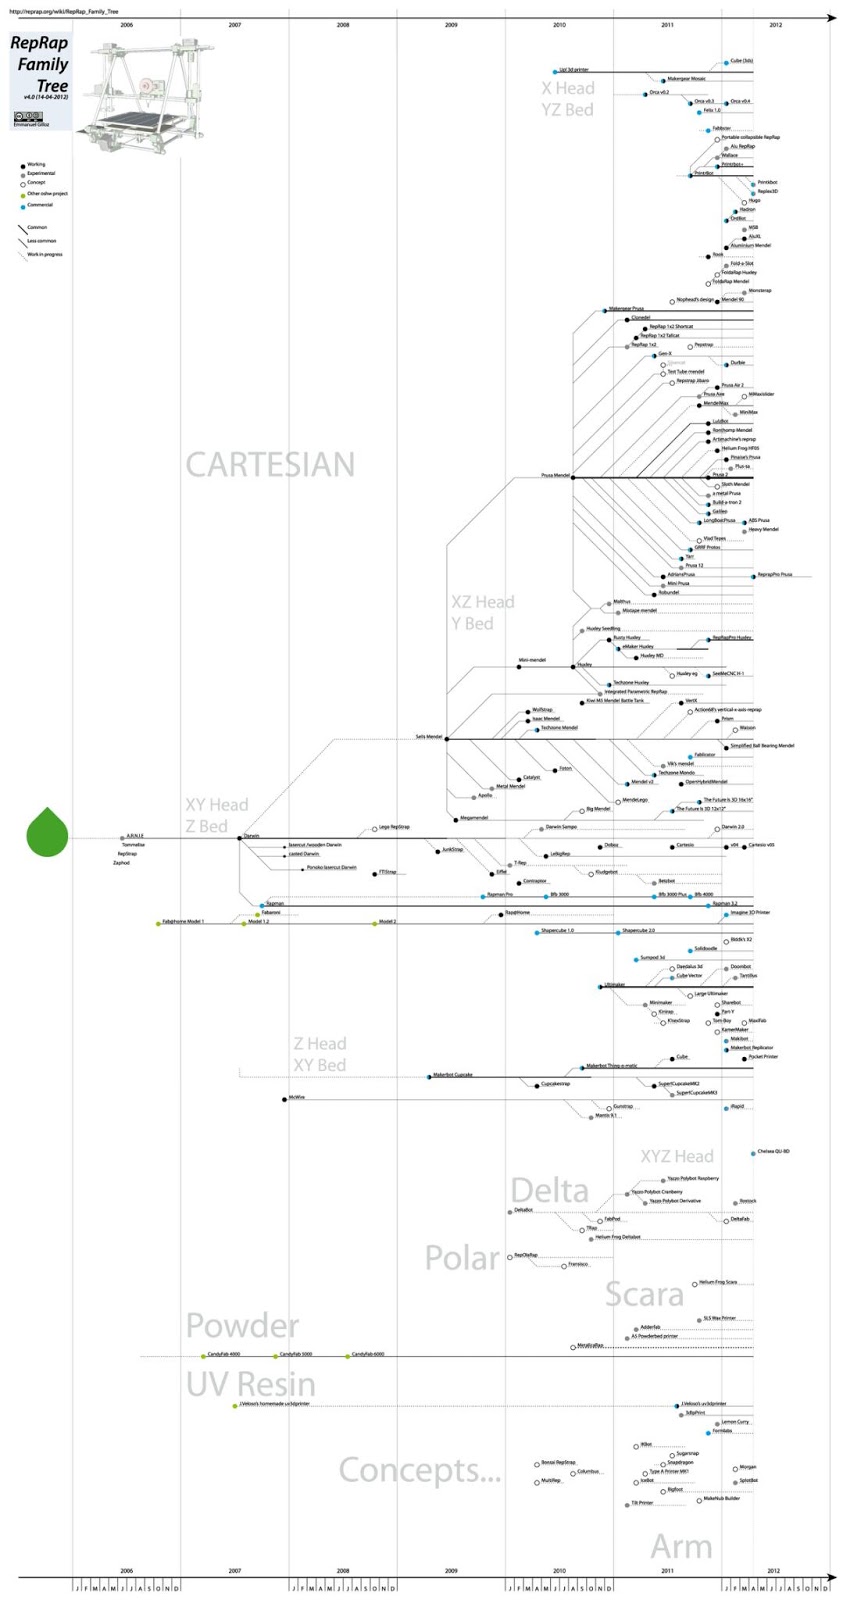
The RepRap Timeline

Here is a timeline of the RepRap machines. Its kinda cool to see the evolution of the industry.